We all know how good it feels to wake up after a solid night’s rest. But sleep isn’t just about feeling refreshed—it’s one of the most critical components of our overall health. Quality sleep supports everything from our immune system to muscle recovery, cognitive function, and emotional balance. Without it, even the best diet or fitness plan can fall flat.
Poor sleep is directly linked to a range of physical and mental health problems, including high blood pressure, depression, weight gain, and even a higher risk of chronic conditions like diabetes and heart disease. Mentally, sleep deprivation can lead to poor concentration, mood swings, and low motivation—something many of us can relate to after just one bad night.
More than just a nighttime inconvenience, poor sleep affects our daytime lives in very real ways. Whether you’re trying to keep up with work, fitness goals, or daily tasks, fatigue can make everything feel harder than it needs to be.
The Science of Breathing and Sleep
You may not think about your breath very often—after all, it happens automatically. But the way you breathe plays a surprisingly big role in how well you sleep.
Your breath is directly connected to your nervous system. Shallow, rapid breathing activates the sympathetic nervous system (your fight-or-flight mode), while deep, slow breaths trigger the parasympathetic nervous system (your rest-and-digest mode). This is the state you want to be in for sleep.
The diaphragm, your primary breathing muscle, is key here. Engaging it properly helps regulate the breath and calms the body. When you take slow, deep breaths using the diaphragm, you send a signal to your brain that it’s safe to relax, which can help reduce stress and ease the body into sleep.
Breathing Techniques for Better Sleep
Here are three powerful breathing techniques you can try tonight to fall asleep faster and sleep more soundly:
4-7-8 Breathing This technique, popularized by Dr. Andrew Weil, is one of the simplest and most effective ways to calm the mind. Here’s how it works:
Inhale through your nose for 4 seconds
Hold your breath for 7 seconds
Exhale slowly through your mouth for 8 seconds Repeat this cycle for four rounds. It slows your heart rate and encourages your body to enter a relaxed state quickly.
Box Breathing Used by Navy SEALs and athletes alike, box breathing is perfect for calming anxiety and improving focus—both helpful before bed.
Inhale for 4 seconds
Hold your breath for 4 seconds
Exhale for 4 seconds
Hold again for 4 seconds Repeat for several minutes. Its rhythm helps you shift away from overthinking and into a steady, meditative state.
Alternate Nostril Breathing (Nadi Shodhana) This traditional yogic practice is excellent for balancing energy and reducing stress.
Close your right nostril with your thumb and inhale through the left nostril
Close the left nostril with your ring finger and exhale through the right
Inhale through the right, then switch and exhale through the left That’s one cycle. Do 5–10 cycles, breathing slowly and gently. It calms the mind and helps you let go of any lingering tension.
Incorporating Breathing Practices into Sleep Routines
You don’t need to overhaul your whole life to make breathing work for better sleep. Small changes go a long way:
Make it part of your bedtime routine: Just like brushing your teeth or dimming the lights, include a few minutes of breathing practice in your wind-down ritual.
Be consistent: The more regularly you practice, the faster your body will learn to relax. Even 5 minutes a night can make a difference.
Get comfortable: Find a sleep position that supports relaxed breathing. Lying on your back with a pillow under your knees or on your side with a pillow between your legs can help.
Focus on the breath: If your mind wanders, gently bring your attention back to the sound and feel of your breath. No judgment, just calm observation.
Breathing is powerful on its own, but when combined with other good sleep habits, it becomes even more effective. This means:
Stick to a consistent sleep schedule: Going to bed and waking up at the same time every day helps regulate your internal clock.
Create a dark, quiet environment: Light and noise disrupt your natural rhythms. Try blackout curtains, earplugs, or a white noise machine.
Avoid screens and stimulants before bed: Blue light and caffeine can keep you wired. Shut down electronics at least an hour before bedtime.
Breathing is a tool you already carry with you—no special equipment needed. By taking just a few moments each night to tune in and breathe with intention, you’re giving your body and mind a gentle invitation to rest. Over time, these simple techniques can transform your sleep—and your life.
Steve
Some links on this site may be affiliate links, and if you purchase something through these links, I will make a commission on them.
There will be no extra cost to you and, you could actually save money. Read our full affiliate disclosure here.
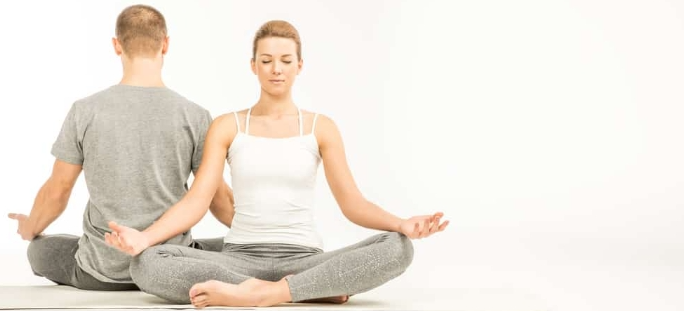
Kundalini Yoga is more than a physical practice—it is a deeply spiritual and energetic experience that aims to awaken the dormant energy coiled at the base of the spine. This sacred tradition combines movement, breath, and sound in a dynamic dance between the body, mind, and spirit. Rooted in ancient teachings, Kundalini Yoga is often referred to as the “yoga of awareness,” and its goal is to help practitioners rise into a higher state of consciousness.
Unlike other styles of yoga that may focus on posture and flexibility, Kundalini Yoga brings your entire energetic system into play. It often begins with a chant to tune in, followed by kriyas—specific sets of exercises that blend movement, mantra, mudra (hand positions), and focused breathwork. Each kriya is designed with a purpose, whether it’s to build inner strength, cleanse emotional blockages, or elevate your vibration.
At the heart of this transformative practice are powerful breathing techniques known as pranayama. These are not just tools for relaxation—they are energetic keys that unlock different states of consciousness.
One of the most famous techniques in Kundalini Yoga is the Breath of Fire. It is a rapid, rhythmic breath through the nose, with equal emphasis on the inhale and exhale, powered from the diaphragm. This breath stimulates the solar plexus and ignites the body’s inner fire. It clears toxins, energizes the nervous system, and builds willpower. Practicing Breath of Fire can feel like an awakening in itself—cleansing, invigorating, and deeply empowering.
For moments when the body or mind feels overheated or overwhelmed, Sitali (Cooling Breath) offers an oasis of calm. To practice it, the tongue is curled into a tube (or placed flat if curling isn’t possible), and the inhale is drawn through the mouth, followed by an exhale through the nose. This breath cools the system, calms inflammation, and quiets emotional tension. It’s like drawing a breeze into the soul.
Then there is the Segmented Breath, where the inhale or exhale is broken into equal parts—often in patterns like four short inhales followed by one long exhale. This technique increases focus and balance in the mind. It also helps dissolve subconscious blocks, allowing clarity and lightness to flow.
The most foundational pranayama is Long Deep Breathing, where the breath is pulled slowly and fully into the belly, ribs, and chest, then exhaled in the same calm rhythm. This breath teaches us to slow down and be present. It centers us, tames anxiety, and opens the gateway to meditation. It is simple, but profound—like the steady heartbeat of the universe itself.
Kundalini Yoga is not just a workout; it is a wake-up call for your soul. Whether you are seeking healing, strength, or higher awareness, the union of breath, movement, and mantra can guide you inward—to the very source of your energy.
Beginners Routine for Kundalini Yoga.
Here’s a beginner Kundalini Yoga routine you can practice at home. This gentle yet powerful sequence includes movement, breath, and mantra—designed to awaken your energy and center your mind.
Beginner Kundalini Yoga Routine
(Approx. 20–30 minutes)
1. Tuning In (2 minutes) Sit in a comfortable cross-legged position. Bring your hands to prayer pose at the heart center. Close your eyes and chant:
“Ong Namo Guru Dev Namo” (Translation: I bow to the Creative Wisdom, I bow to the Divine Teacher within.)
Repeat this mantra three times to connect to the wisdom of the practice and align yourself energetically.
2. Spinal Flexes (3 minutes) Sit cross-legged, hold your shins or ankles. Inhale as you flex the spine forward, lifting the chest. Exhale as you round the spine backward. Continue rhythmically with Breath of Fire or long deep breathing. This awakens the spine and balances energy along the chakras.
3. Cat-Cow Pose (2–3 minutes) Come onto your hands and knees. Inhale, arch the spine, lift the head and tailbone (Cow). Exhale, round the spine (Cat). Use Long Deep Breathing here to bring awareness to each movement. This helps circulate energy and warm up the spine.
4. Ego Eradicator (1–2 minutes) Sit tall. Raise your arms at a 60-degree angle, fingers curled into the pads at the base of each finger (thumbs pointing up). Begin Breath of Fire. Focus at the third eye (between the eyebrows). To end, inhale, touch thumbs together overhead, exhale and sweep the arms down. This kriya clears negativity and strengthens the aura.
5. Sufi Grind (2 minutes) Remain seated. Place your hands on your knees. Begin to rotate your torso in large circles clockwise, then counterclockwise. Inhale as you move forward, exhale as you circle back. Use this to open the hips and massage the internal organs.
6. Meditation with Segmented Breath (3–5 minutes) Sit calmly with eyes closed. Inhale in four short sniffs, exhale in one long breath through the nose. Focus gently at the brow point. This helps train the mind, center emotions, and bring lightness.
7. Sitali Cooling Breath (2 minutes) Curl your tongue into a tube and inhale through the curled tongue, exhale through the nose. (If you can’t curl your tongue, simply inhale through pursed lips.) This soothes the nervous system and calms excess heat or restlessness.
8. Closing (2 minutes) Bring hands to heart center. Chant:
“Sat Nam” (Truth is my identity) Repeat three times. Let the vibration settle through your being.
Final Notes
Always listen to your body—Kundalini Yoga is about inner experience, not perfection.
Practice on an empty stomach and in a quiet space.
A regular practice, even 15 minutes a day, can create powerful shifts over time.
Breathe. Move. Chant. Let your energy rise.
Start where you are, breathe deeply, and let your spirit rise. The journey has already begun.
Steve
Some links on this site may be affiliate links, and if you purchase something through these links, I will make a commission on them.
There will be no extra cost to you and, you could actually save money. Read our full affiliate disclosure here.
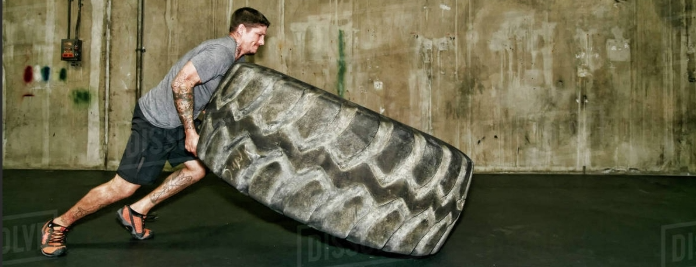
Cross training is like your fitness buffet. You get a little bit of everything, which makes it exciting and beneficial. It’s a workout style where you mix up different types of exercises to keep your routine fun and your body guessing.
The concept of cross training isn’t brand new, but it’s gained a lot of popularity in the fitness community. It was initially adopted by athletes wanting to enhance their performance and avoid burnout by varying their workouts.
Beginners
For a beginner, the allure of cross training is that it helps you build a strong fitness base. By integrating various types of workouts, you’re not only improving your overall fitness but also reducing the risk of overuse injuries. When you spread out your physical stress across different activities, your body gets to recover better.
Why stick to one thing when you can enjoy the benefits of many? With cross training, you might swim one day, run the next, and then hit a yoga class. This variety not only boosts your fitness levels but also helps ward off workout boredom. Plus, mixing it up can lead to new interests and uncover hidden athletic talents.
Think of cross training as the foundation of a well-rounded fitness routine. It empowers you to become more versatile and resilient. So, if you’re stepping into the world of exercise, cross training sets you up with the tools you need to dive into any physical activity with confidence.
Designing Your Cross Training Plan
Crafting a cross training plan can be like piecing together a personalized fitness puzzle. The key is understanding the different types of exercises you can include. You’ve got strength training, which pumps up those muscles, cardio for your heart health, and flexibility workouts like yoga to keep you limber and free of injuries.
Balancing your workout intensity with adequate rest is crucial. Overdoing it can lead to fatigue, while not enough can leave you feeling unchallenged. A smart mix ensures that you’re always moving towards your goals without burning out. Listen to your body; it’ll tell you when to push and when it needs a little break.
Creating a plan means getting real about your goals and current fitness level. Start small and specific; maybe it’s running a 5K or just not feeling winded climbing stairs. Let those be your guide to choose workouts that align with these goals, gradually upping the intensity as you improve.
Keeping it fresh is how you stay engaged. Swap exercises every now and then so you don’t get stuck in a rut. Trying new activities might surprise you with newfound loves or skills. If kickboxing gets your heart racing, throw that in your week! Variety really is the spice of your workout life.
Ultimately, your cross training plan should feel tailored just for you. The best plans offer variety but also allow for flexibility. On days when you’re just not feeling it, listen to your body and maybe opt for a gentler session. The most important thing is consistency. Setbacks happen, but showing up is how you win the bigger game.
Achieving Success in Cross Training
Staying motivated in your cross-training journey doesn’t have to be hard, especially when you set goals that are realistic and rewarding. Short-term targets like mastering a new exercise or hitting a personal record can keep you pumped. They provide small wins and keep you looking forward to the next workout.
Celebrating milestones, no matter how small, fuels motivation and gives a sense of achievement. Hit your squat goal? That’s worth a cheer. Knocked out a longer run than you thought possible? Pat yourself on the back! These moments of success remind you why you started in the first place.
Tracking your progress can be super satisfying and helps you see the fruits of your effort. Tools and apps designed for fitness can be your best bud here. They offer features to log workouts, measure improvements, and set reminders, helping you keep your eye on the prize. Seeing progress laid out can be incredibly motivating, and it helps you tweak your plan when needed.
Success stories from those who’ve been where you are can provide the inspiration you need on tough days. Hearing how others overcame similar challenges and reached their goals can push you to stick to your path. Whether it’s a friend or someone on a forum, their victory can fuel your own.
And…
Ultimately, cross training isn’t just about the physical gains but about discovering what you’re capable of and enjoying the journey you’re on. Stay curious, keep exploring, and remember: every step forward, no matter how small, counts towards your fitness transformation.
Steve
Some links on this site may be affiliate links, and if you purchase something through these links, I will make a commission on them.
There will be no extra cost to you and, you could actually save money. Read our full affiliate disclosure here.
In the age of dynamic content creation, drones have revolutionized how we document our fitness journeys. Whether you’re sprinting through a trail, practicing yoga in the park, or cycling along coastal roads, drones offer unique perspectives that handheld cameras can’t match. Let’s delve into the top three drones of 2025 that are perfect for capturing exercise moments and compare their features to help you choose the best fit for your needs.
1. DJI Mini 4 Pro
Key Features:
Ultra-Lightweight Design: Weighing under 250g, it’s exempt from many drone regulations, making it ideal for casual users.
Impressive Camera Capabilities: Equipped with a 48MP sensor and 4K video recording, ensuring high-quality footage.
Omnidirectional Obstacle Sensing: Enhances safety by detecting obstacles in all directions.
Vertical Shooting Mode: Perfect for social media content, especially Instagram and TikTok.
Extended Flight Time: Offers up to 34 minutes of flight, allowing ample time to capture your workouts.
Ideal For: Fitness enthusiasts seeking a portable, user-friendly drone that delivers professional-quality footage without the complexity.
2. DJI Air 3S
Key Features:
Dual-Camera System: Features both wide-angle and 3x telephoto lenses, providing versatility in shooting.
Advanced Obstacle Avoidance: Incorporates LiDAR technology for precise navigation and safety.
Extended Flight Duration: Boasts up to 45 minutes of flight time, reducing the need for frequent battery changes.
OcuSync 4.0 Transmission: Ensures stable and long-range video transmission, crucial for tracking fast-paced activities.
Ideal For: Athletes and content creators who require a balance between advanced features and portability for diverse shooting scenarios.
3. DJI Mavic 3 Pro
Key Features:
Triple-Camera System: Includes a 20MP Hasselblad main camera and two telephoto lenses (3x and 7x), offering unparalleled versatility.
Professional-Grade Video: Supports 5.1K video recording, catering to high-end content production.
Extended Flight Time: Provides up to 43 minutes of flight, suitable for prolonged shooting sessions.
Advanced Safety Features: Equipped with omnidirectional obstacle sensing and APAS 5.0 for smooth navigation.
Ideal For: Professional videographers and serious fitness influencers aiming for cinematic-quality footage and comprehensive shooting options.
Benefits of Using Drones for Capturing Exercise Moments
Dynamic Perspectives: Drones provide aerial views that add depth and context to your workouts, showcasing surroundings and movements in a captivating manner.
Hands-Free Operation: With features like Active Track, drones can autonomously follow and film you, allowing you to focus entirely on your exercise.
Enhanced Content Quality: High-resolution cameras and advanced stabilization ensure smooth, professional-looking footage, elevating your content’s appeal.
Motivation and Progress Tracking: Visually documenting your workouts can boost motivation and help track progress over time, providing tangible evidence of improvement.
Conclusion
Selecting the right drone depends on your specific needs and budget. The DJI Mini 4 Pro is perfect for beginners and casual users seeking portability and ease of use. The DJI Air 3S offers a balance between advanced features and user-friendliness, suitable for intermediate users. For professionals aiming for top-tier content, the DJI Mavic 3 Pro delivers unparalleled quality and versatility.
Investing in a drone can significantly enhance how you capture and share your fitness journey, providing unique perspectives and high-quality footage that inspire and engage your audience.
Note: Prices and features are based on information available as of April 2025 and may vary based on region and retailer.
Steve
Some links on this site may be affiliate links, and if you purchase something through these links, I will make a commission on them.
There will be no extra cost to you and, you could actually save money. Read our full affiliate disclosure here.
Sore knees can creep up on anyone—whether you’re a recovering athlete pushing your limits or someone in their golden years simply trying to stay active. Knee pain often signals inflammation, overuse, or weakening muscles around the joint. The good news is that relief doesn’t always have to come from over-the-counter pills or long-term rest. With gentle exercises and soothing natural remedies, you can start feeling better right at home.
In this blog, we’ll explore four simple exercises perfect for sore knees and two easy-to-make natural balms using common ingredients. Let’s start by moving gently and then we’ll get into the homemade pain relief recipes.
Four Gentle Knee Exercises for Recovery and Mobility
These exercises are low-impact and focus on improving flexibility, circulation, and strength in the muscles that support the knee joint. Always start slowly, and if pain increases, stop immediately.
1. Seated Leg Extensions Sit in a sturdy chair with both feet flat on the ground. Slowly extend one leg until it’s straight, hold for three seconds, then lower it back down. Alternate legs for 10 repetitions each. This helps strengthen the quadriceps without putting pressure on the knees.
2. Heel Slides Lie on your back, legs straight. Slowly slide one heel toward your buttocks while keeping your foot flat on the floor. Slide it back down and switch legs. This gentle motion helps with knee mobility and reduces stiffness.
3. Calf Raises Stand behind a chair for balance. Lift your heels off the ground so you’re standing on your toes, hold for a second, then lower your heels slowly. Do 2 sets of 10. This strengthens the calf muscles and improves circulation around the knee.
4. Hamstring Curls (Standing or Lying Down) If standing, hold onto a chair and lift one foot behind you toward your buttocks, bending the knee. Hold, then lower. If lying down, do the same motion while on your stomach. Aim for 10 repetitions per leg. This strengthens the hamstrings, which support the knee.
Do these exercises three to five times a week to see gradual improvement in flexibility and pain levels.
Natural Pain Relief
Homemade Knee Balm Recipes
After your exercises, soothing your knees with a warming or cooling balm can really help. These two homemade ointments use natural anti-inflammatory ingredients and essential oils that are known to reduce pain and swelling.
5 drops black pepper essential oil (optional but warming)
Instructions:
Gently melt the coconut oil and beeswax in a small pot or double boiler.
Stir in the turmeric and ginger until well blended.
Remove from heat and add the essential oils.
Pour into a small jar or tin and let it cool until solid.
Massage into sore knees 1–2 times per day.
Why it works: Turmeric and ginger are natural anti-inflammatories. Eucalyptus and black pepper oils create a gentle warming sensation to increase circulation.
2. Minty Arnica Cooling Balm
Ingredients:
1/4 cup olive oil infused with dried arnica flowers (or buy arnica oil)
1 tablespoon beeswax pellets
10 drops peppermint essential oil
10 drops lavender essential oil
5 drops rosemary essential oil (optional)
Instructions:
Warm the arnica oil and beeswax over low heat until melted.
Stir in the essential oils, then pour into a jar or tin.
Let it solidify before use.
Rub onto sore knees after activity or at bedtime.
Why it works: Arnica is widely used for bruises and joint pain. Peppermint oil offers a cooling effect, while lavender and rosemary help calm inflammation and ease tension.
Taking care of sore knees is all about balance. Gentle movement improves circulation and joint support, while natural topical remedies reduce inflammation and pain. Whether you’re recovering from intense activity or managing age-related wear and tear, consistent care goes a long way.
Try incorporating these exercises and balms into your routine for a couple of weeks—and see how your knees respond. Let me know in the comments if you’ve tried a homemade remedy that works for you, or if you’d like more natural care tips in the future.
Here’s to healthy, happy knees—naturally!
Steve
Some links on this site may be affiliate links, and if you purchase something through these links, I will make a commission on them.
There will be no extra cost to you and, you could actually save money. Read our full affiliate disclosure here.
How Breathing Exercises Can Help You Relieve Stress
Welcome to our journey into something so simple yet so powerful: your breath. Today, we’re diving into how breathing exercises can become one of your best tools for stress relief and overall well-being.
Let me start by sharing something personal. A couple of years ago, I hit a wall. Between work pressure, sleepless nights, and constant overthinking, I found myself drained—physically and emotionally. I remember sitting in my car, stuck in traffic, my heart racing and my jaw clenched.
Out of desperation, I tried a deep breathing exercise I had read about the night before. I inhaled deeply, held it, and exhaled slowly. For the first time in weeks, I felt a sliver of calm wash over me. That small moment sparked a big change. I started practicing breathing techniques regularly, and it transformed how I handle stress.
Breathing is not just automatic—it’s essential to how we live, feel, and function. According to a 2021 study published in the Journal of Alternative and Complementary Medicine, regular breathing exercises can reduce symptoms of anxiety, improve sleep, and even enhance cognitive performance. It’s amazing to think that something so simple can have such a wide-reaching impact.
Understanding Stress and Your Breath
Let’s talk about the connection between stress and how we breathe. When we’re stressed, our breathing becomes shallow and rapid—this is our body’s fight-or-flight response. Unfortunately, this kind of breathing can make stress worse by reducing oxygen intake and increasing feelings of panic.
The American Psychological Association released a study in 2023 showing that people who experience chronic stress often develop patterns of shallow breathing, which in turn reinforces their stress response.
Want to feel this for yourself? Try holding your breath for 10–15 seconds. Notice how your body tenses, your heartbeat increases, and you start to feel uneasy? That’s exactly what happens with shallow breathing.
Now, contrast that with diaphragmatic breathing, also called belly breathing. This technique involves engaging the diaphragm to draw air deeper into your lungs. It activates your parasympathetic nervous system—the part responsible for calm and rest—and leads to a more relaxed state. It’s simple, effective, and incredibly soothing.
The 4-7-8 Breathing Technique
One of the most effective techniques I’ve discovered is the 4-7-8 breathing technique. Here’s how it works:
Sit up straight and relax your shoulders.
Inhale through your nose for a count of 4.
Hold your breath for a count of 7.
Exhale slowly through your mouth for a count of 8.
Repeat this cycle for 4 to 6 rounds.
Keep your breathing steady and controlled. The long exhale is especially helpful in slowing down your heart rate and calming your nervous system.
I’ve demonstrated this technique in my videos, and viewers often tell me how quickly it helps them feel grounded. One viewer wrote, “I used the 4-7-8 technique before a job interview, and it made such a difference. I walked in calm and confident.”
Beyond the 4-7-8: Exploring Other Breathing Exercises
While 4-7-8 is a great starting point, there are other powerful breathing exercises worth trying:
Box Breathing: Also known as square breathing, this technique is used by Navy SEALs and athletes to stay calm and focused. Inhale for 4 seconds, hold for 4, exhale for 4, hold again for 4—and repeat.
Alternate Nostril Breathing: A staple in yoga practices, this technique balances the left and right sides of your brain. Close your right nostril and inhale through your left, then switch and exhale through your right. Inhale through the right, switch again, and exhale through the left. It’s calming and helps with focus.
Lion’s Breath: This is a fun, energizing technique. Sit comfortably, inhale deeply through your nose, then exhale forcefully through your mouth while sticking out your tongue and making a “ha” sound. It releases tension in the face and neck and boosts your mood.
These exercises can be practiced anytime and anywhere. Some are great for winding down, others for energizing yourself mid-day. Don’t be afraid to experiment and see which ones resonate with you.
Building a Daily Breathing Practice
Incorporating breathing exercises into your daily life can bring lasting benefits. From reducing anxiety and improving sleep to enhancing mental clarity, the positive effects are real and backed by science.
Here are some easy ways to fit breathing exercises into your routine:
Practice 4-7-8 breathing before bed to help you fall asleep faster.
Use box breathing during work breaks to reset and refocus.
Try alternate nostril breathing during your morning meditation or while riding public transport.
Let lion’s breath be your go-to when you need a quick mental refresh.
Breathing doesn’t take much time or effort, but it can completely shift your mental and physical state. If you’re new to this, start with just 2 minutes a day. Set a reminder on your phone. Pair it with an existing habit, like brushing your teeth or making coffee.
Let’s Breathe Together
Have you tried any of these breathing techniques before? Do you have a favorite that works for you? I’d love to hear your stories. Drop a comment below and share your experience—it could help someone else who’s just getting started.
Remember, every deep breath is a chance to reset. Let’s make breathing with intention a part of our everyday life. You’ve got this.
Steve
Some links on this site may be affiliate links, and if you purchase something through these links, I will make a commission on them.
There will be no extra cost to you and, you could actually save money. Read our full affiliate disclosure here.
When you’re trying to gain muscle and lose weight at the same time, food is your most powerful tool. But not all of us want to spend hours meal-prepping or cooking complicated recipes. That’s where smart choices come in. At The Lazy Athlete, we believe in simple solutions that work — even if you’re not a gym rat or a kitchen wizard.
Here are 10 easy-to-find foods that help build lean muscle while promoting fat loss, plus a few lazy-friendly recipes that make them super easy to enjoy.
1. Eggs
Eggs are one of the best complete protein sources. They contain all nine essential amino acids, which are crucial for muscle repair and growth. The healthy fats in the yolk also help with fat metabolism.
Easy Recipe: Microwave Egg Mug Crack 2 eggs into a mug, toss in a splash of milk, a pinch of salt, and a handful of spinach. Microwave for 90 seconds and eat straight from the mug.
2. Greek Yogurt
Packed with protein and probiotics, Greek yogurt helps you stay full longer and supports muscle synthesis. The casein protein in it digests slowly, making it perfect for a nighttime snack.
Easy Recipe: Power Bowl Mix a cup of Greek yogurt with a spoon of peanut butter, half a banana (sliced), and a sprinkle of granola.
3. Chicken Breast
Lean and loaded with protein, chicken breast helps with muscle recovery without adding unnecessary fat. It’s also versatile and works in almost any dish.
Easy Recipe: Rotisserie Chicken Wrap Grab pre-cooked rotisserie chicken, stuff it in a whole-wheat wrap with some lettuce, Greek yogurt (instead of mayo), and shredded carrots.
4. Oats
Oats give you complex carbs, which fuel workouts and keep hunger away. They’re high in fiber and help with fat loss by stabilizing blood sugar levels.
Easy Recipe: Overnight Oats In a jar, mix ½ cup oats, ½ cup almond milk, 1 tbsp chia seeds, and a few berries. Refrigerate overnight. No cooking needed.
5. Tuna
Tuna is high in lean protein and omega-3s, which help reduce inflammation and promote fat burning. It’s also incredibly convenient from a can or pouch.
Easy Recipe: Tuna Protein Salad Drain a can of tuna, mix with a spoon of Greek yogurt, a squirt of mustard, chopped pickles, and black pepper. Eat it as-is or throw it in a sandwich.
6. Quinoa
Quinoa is a rare plant-based food that contains all nine essential amino acids. It’s also high in fiber and supports fat loss while feeding your muscles.
Easy Recipe: Microwave Quinoa Bowl Use pre-cooked frozen quinoa packs. Microwave, then top with chopped veggies, canned black beans, and a drizzle of olive oil.
7. Salmon
Rich in protein and healthy fats, salmon boosts metabolism and builds muscle. It’s also a solid source of vitamin D, which helps support testosterone levels.
Easy Recipe: One-Pan Salmon & Veggies Lay salmon fillets on foil, add frozen broccoli and a splash of soy sauce. Wrap and bake at 400°F (or air-fry for 15 mins). Done and delicious.
8. Cottage Cheese
Another casein-rich food, cottage cheese is great for slow digestion. It keeps you full and promotes muscle repair overnight.
Easy Recipe: Sweet & Savory Bowl Top a bowl of cottage cheese with cherry tomatoes, cracked pepper, or go sweet with cinnamon and a little honey.
9. Chickpeas
Chickpeas are high in protein and fiber, which helps with muscle gain and appetite control. They’re also perfect for plant-based athletes.
Easy Recipe: Easy Hummus Snack Blend canned chickpeas, olive oil, lemon juice, and garlic (or use store-bought hummus) and eat with cucumber slices or whole-grain crackers.
10. Almonds
Almonds are packed with healthy fats, magnesium, and protein. They’re perfect for boosting your muscle-building metabolism and make a great on-the-go snack.
Easy Recipe: Almond Energy Bites Mix almond butter, oats, protein powder, and a bit of honey. Roll into balls, refrigerate. No baking required.
Final Thoughts for Lazy Athletes
You don’t have to be a chef or a gym junkie to eat right. By focusing on these 10 nutrient-dense, muscle-building, and fat-burning foods, you can level up your fitness with minimal effort. Combine them with light workouts, proper hydration, and sleep, and you’re golden.
Keep it simple. Stay consistent. And remember — even lazy athletes like me can get strong.
Want more lazy fitness tips, recipes, and no-nonsense advice? Stay tuned to TheLazyAthlete.net — where smart choices beat hard work every time.
Follow me on YouTube for more “health and diet” tips.
Steve
Some links on this site may be affiliate links, and if you purchase something through these links, I will make a commission on them.
There will be no extra cost to you and, you could actually save money. Read our full affiliate disclosure here.
In today’s world, where screens dominate our lives, it’s really no wonder bad posture has become such a widespread issue. We’re talking long hours hunched over desks, eyes glued to phones, and hardly a break to stretch. All these habits pile up, making slouching a part of the norm.
Spotting bad posture isn’t always a piece of cake. Rounded shoulders, a neck that juts forward, or a back that curves more than it should are all giveaways. But it’s not just about standing or sitting straight. Poor posture can make your back ache and even mess with your confidence.
Good posture plays a huge role in both our health and how we carry ourselves. It can affect everything from how comfy you feel to your mood. Imagine walking into a room with your head held high and your back straight. It gives off a vibe of confidence and internal strength.
So, why do those aches and pains happen when posture isn’t right? It’s all about the muscles and joints working overtime. Our bodies aren’t built to be slumped or twisted for too long.
Muscles get stretched or tight in all the wrong places, leading to discomfort or pain. Understanding these roots helps in figuring out how important it is to make changes.
Four Exercises that can help improve poor posture.
Let’s face it, most of us could use a little help maintaining good posture. The secret weapon?
Exercise is one of them. Regularly doing specific exercises can help strengthen muscles and ease out those nagging posture issues.
Simple stretches like chest openers and seated twists are great starting points for loosening up muscles that have stiffened from all the hunching. They’re super easy to fit into your day and can work wonders in letting your body realign.
Another great option is focusing on your core muscles. Strengthening your abs and back muscles is crucial for maintaining a solid posture base. Planks and bridges are top picks here, boosting strength and stability that keep you upright and strong.
For those suffering from tech neck or slouched shoulders, exercises like chin tucks and scapular squeezes come in handy. They specifically target the muscles that help pull everything back in line.
Let’s go through some essential moves.
1. Wall Angels
Purpose: Strengthens the upper back, shoulders, and helps correct rounded shoulders.
How to do it:
Stand with your back against a flat wall. Your feet should be about 6 inches away from the wall, and your lower back, upper back, and head should all be touching the wall.
Raise your arms up to shoulder height with elbows bent at 90 degrees, like you’re making a goalpost shape. The backs of your hands and arms should also be touching the wall.
Slowly raise your arms up overhead while keeping them in contact with the wall. Go as high as you can without arching your back or losing contact with the wall.
Slowly bring your arms back down to the starting position.
Repetitions: 2 to 3 sets of 10 reps Tip: Go slow and controlled, quality over quantity.
2. Chin Tucks
Purpose: Strengthens the deep neck flexors and counteracts forward head posture.
How to do it:
Sit or stand tall with your shoulders relaxed.
Look straight ahead and gently draw your chin straight back toward your neck, as if you’re making a double chin. Don’t tilt your head up or down—just pull it straight back.
Hold the tuck for 5 to 10 seconds.
Relax and return to neutral.
Repetitions: 10 repetitions, 2 to 3 times per day Tip: You can do this exercise anywhere—even while sitting at your desk.
3. Bird Dog
Purpose: Strengthens the core, glutes, and lower back, all of which support good posture.
How to do it:
Start on your hands and knees, with hands directly under your shoulders and knees under your hips.
Extend your right arm straight forward and your left leg straight back, forming a straight line from your hand to your foot.
Keep your hips level and avoid arching your lower back.
Hold for 5 seconds, then return to the starting position.
Switch to the left arm and right leg.
Repetitions: 8 to 10 reps on each side Tip: Engage your core muscles to stay stable.
4. Doorway Pec Stretch
Purpose: Stretches tight chest muscles that pull your shoulders forward.
How to do it:
Stand in a doorway with your arm bent at a 90-degree angle, resting your forearm against the doorframe.
Step forward with one foot to feel a stretch in your chest and the front of your shoulder.
Hold this stretch for 20 to 30 seconds.
Switch sides and repeat.
Repetitions: 2 to 3 times on each side Tip: Keep your shoulder relaxed and don’t overstretch—it should feel good, not painful.
Remember, consistency is the golden rule when you want to really improve your posture through exercise. Make it a part of your daily routine, even if it’s just a few minutes each day. Set reminders or integrate these exercises during TV breaks to make it stick.
When done consistently they can help realign your spine, strengthen your posture muscles, and reduce strain on your neck and shoulders. Let me know if you want a printable routine or illustrations to go with these!
These are game changers. I spend hours on a computer every-day and whatever exercises I do, (And I do a lot) I always revert back to bad posture.
Now I slap on this cheap product, (Less than 40 USD) and it keeps my back straight and upright all day.
Honestly It feels a little strange to start with, but after a while you get used to it and it is so much better for your posture. I challenge anyone to say otherwise.
Final Thoughts
It’s not just about exercise; daily habits play a huge role in maintaining good posture. Ergonomics is a game changer in improving how you work and move daily.
Setting up your workspace to support your back and neck can make a big difference. Adjust your chair, position your computer monitor at eye level, and ensure your feet are flat on the floor to find your perfect setup.
Everyday tasks can be a chance to practice mindful movements. Whether you’re lifting groceries or walking to the next room, keep posture in mind.
Straighten up, engage your core, and avoid unnecessary strain wherever you are.
Simple adjustments like this transform regular chores into mini-posture workouts.
In the dynamic world of fitness, capturing your workouts can be both motivating and rewarding.
Whether you’re tracking progress, sharing your journey, or creating content, having the right camera is essential.
Here are the top three cameras that combine quality, durability, and convenience for fitness enthusiasts.
GoPro HERO13 Black.
The Ultimate Action Companion
The GoPro HERO13 Black is a powerhouse for capturing high-intensity workouts. With its 5.3K video capability and Emmy® Award-winning Hyper-Smooth stabilization, every movement is recorded with clarity and smoothness.
The magnetic latch mounting system allows for versatile attachment, ensuring you can capture unique angles during your exercises.
Additionally, the interchangeable HB-Series lenses provide creative flexibility, whether you’re aiming for ultra-wide shots or detailed close-ups. The enhanced battery life ensures that your camera keeps up with your longest sessions.
For those new to recording their fitness routines or seeking a straightforward device, the 2024 GoPro HERO is an excellent choice. Its compact size, weighing only 86 grams, makes it easy to carry and mount.
Despite its simplicity, it doesn’t compromise on quality, offering 4K video recording and a rugged, waterproof design. This camera is perfect for capturing everyday workouts without the complexity of more advanced models.
The Insta360 GO 3S redefines portability in action cameras. Weighing just 39 grams, it’s designed for hands-free recording, attaching effortlessly to your gear or clothing.
Despite its size, it delivers 4K video resolution and is waterproof up to 10 meters, making it suitable for various workout environments.
Features like Interval Video mode and Apple Find My compatibility add to its convenience, ensuring you never miss a moment of your fitness journey.
Choosing the right camera depends on your specific needs and workout routines. Whether you prioritize high-quality footage, ease of use, or portability, these top three cameras offer excellent options to enhance your fitness documentation.
Happy snapping and keep on loading them to social media.
Your knees—they do a lot more work than you might think. Whether you’re a weekend warrior on the basketball court, a daily jogger hitting the pavement, or maybe someone whose job involves kneeling often, your knees take the hit again and again.
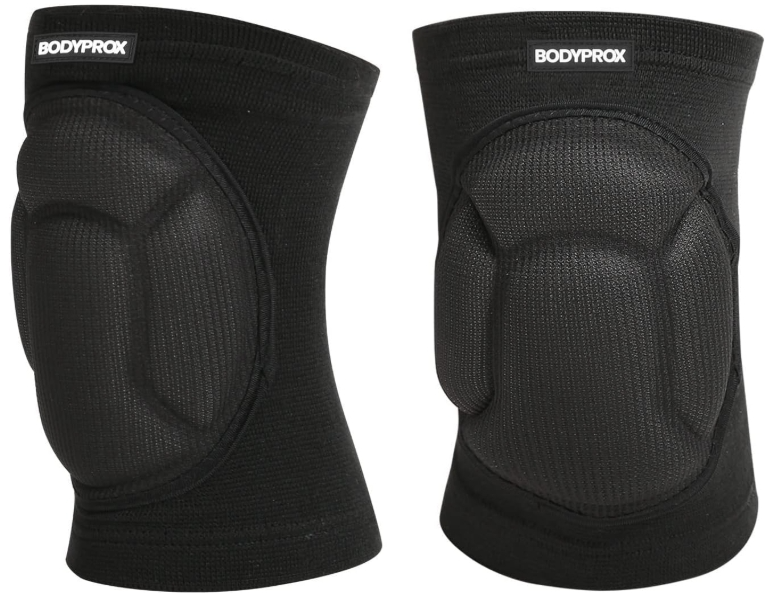
Protecting these critical joints can make a significant difference to your comfort and mobility down the line. Knee pads give that essential cushioning and support that can help prevent nasty injuries or wear and tear over time.
Ever notice the variety of knee pads out there and wonder which ones to pick? There’s a surprisingly wide selection depending on what you’re up to.
Construction and gardening often call for those heavier-duty pads, complete with serious padding and maybe even a hard outer shell to ward off sharp stones or rough surfaces.
For sports like volleyball or skateboarding, look for something lighter and flexible yet provides ample protection when you hit the floor or take a spill. Something like this.
Now, let’s break down what makes a knee pad effective. Fit is key—too loose and they won’t stay put when you’re on the move; too tight and they’ll uncomfortably dig into your skin.
The material also matters. Look for breathable fabrics to avoid getting too hot and make sure they’re easy to clean because things can get sweatier than you’d think.
Knowing the right time to put on those knee pads can save not only your knees but your day, too. You’d want them securely fastened whether you’re lifting heavy boxes, going for a full-day hike, or spending the day crafting stuff with heavy tools. Think of them as your insurance against those ‘should have worn pads today’ regrets.
Expert advice often shines a light on how overlooked knee care is. Orthopedic specialists and sports pros will tell you: prevention now is better than treatment later.
Having reinforcement on where it matters could cut the risk of strains and other injuries significantly. It’s not just about safety; it’s about quality of life.
You’ve probably heard people thinking wearing knee pads isn’t cool or saying they aren’t needed unless injuries are present.
But these myths are nothing more than misconceptions that could lead you into avoidable trouble. Promoting overall joint health and safety is about being smart, not looking tough.
My Wrap
Hear it from those who’ve been there, done that. Like me and many others I know, athletes and regular folks alike who’ve praised their knee pads after avoiding serious injury.
They often share personal stories of how what seemed like a small thing to wear made huge differences. Don’t wait for a scare to make them a part of your routine.
Steve
Some links on this site may be affiliate links, and if you purchase something through these links, I will make a commission on them.
There will be no extra cost to you and, you could actually save money. Read our full affiliate disclosure here.